Sewing a Patchwork Curtain with French Seams Tutorial
When I launched my Naturally Dyed Scrap Boxes a few weeks ago, a lot of you said you planned to sew a curtain with the kits. I thought it would be fun to make a tutorial for you and make your life a little easier :) You can find my tutorial here on my blog with full video accompaniment. I love this method of making a curtain with completely finished French seams on the back so that your curtain looks beautiful from both the front and the back. I'm thinking about offering a class where we learn this technique, is that something you'd be into? If you're looking to learn the basics of sewing, come join a sewing class. Find all my workshops here.
Materials Needed
- Fabric scraps - ideally gauzy or sheer
- Sewing machine
- Iron and ironing board
- Pins
- Cutting mat and rotary blade or fabric shears
- Ruler
How to Sew a French seam:
To sew a French seam, sew the two pieces with wrong sides of the fabric together using a 3/8” seam allowance. If your fabric looks the same on both sides, just designate one side as the “right side”. Add a piece of blue painters tape to one side of the fabric if you think you will forget. Press the seam allowance to one side. Trim your seam allowance down to be approximately 1/4”. Flip your work over, and then fold the fabric over to one side and press. Stitch the seam down again at 3/8”. Now, the raw edges will be fully enclosed and your seams will look neat on both sides. The purpose of a French seam is to hide any raw edges from seams and ensure the piece looks neat on both the front and the back of the curtain. This technique is discussed in the video, so if you're confused just watch the first part!

Making the Curtain:
Step One: Decide the size of the curtain you’d like to make by measuring the window or doorway it will hang in. I recommend sewing a piece that is 1.5x to 2x the width of the place you’d like to hang your curtain so it has some fullness to it. If you sew the curtain the exact width of the window, it will hang taut instead of gathered.
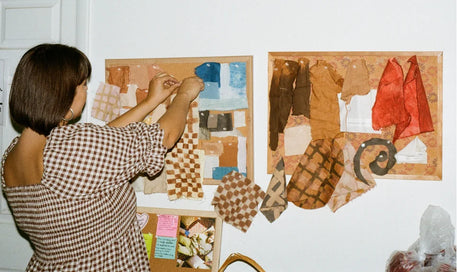
Step Two: Collect your fabric scraps. I recommend using a semi sheer or gauzy fabric so you can still get light coming through the curtain. Select the color palette you’d like to use, arrange the colors you think look nice next to each other.
Step Three: Clean up the edges of the pieces to ensure they have straight edges. I like to use a rotary blade and cutting mat for this.
Step Four: Starting with a larger scrap piece, pick a smaller piece that fits alongside one edge and trim the pieces to line up on one edge. Pin the two pieces together.
Step Five: Sew the two pieces of fabric using a French Seam (see full instructions above).
Step Six: Repeat this process by adding fabrics that match along one side of the last patch you did. I like to create long strips and then attach the long strips together with another French seam.
Step Seven: To make the loops to hang the curtain, cut a piece of fabric that measures 6” x 32” for four loops, add 8" for each additional look you would like. Fold the piece in half and press. Then open the piece and fold both ends towards the line you just created from pressing. Then, fold the piece in half. Edge stitch along the side to secure it down.
Step Eight: Cut your strip into 4 pieces that are 8” long. If your curtain is wider, repeat this process to add more loops to hang the curtain.
Step Nine: Align the cut side of the loops to the top of your curtain. I like to place one about 3” in from each end and spaced evenly throughout the curtain. Pin in place.
Step Ten: Cut a piece for the facing (this disguises the raw edges from the loops) measuring 6” x the width of your curtain. In the video, my curtain is 34" wide so I cut a piece that is 6"x 34". Hem the facing piece by folding up the edge of the fabric 1/4” and then folding it up 1/4” again and edge stitching down.
Step Eleven: Sandwich the loops between the curtain and the facing on the right side of the curtain. Stitch in place using a 3/8” seam allowance. Press the facing to the back of the curtain and then top stitch to secure it in place.
Step Twelve: Hem the sides and bottom of your curtain.
Step Thirteen: Hang your curtain and enjoy!


