


Dyeing with Onion Skins: Your Low-waste Intro to Plant Dyes at Home

If you’re interested in plant dyes but aren’t quite sure where to start, this post is for you.
When I started experimenting with natural dyes 11 years ago, I found onion skins to be the one of the most accessible materials to start with. Dyeing with onion skins is a low-waste way to get creative in your own kitchen, and learn the process of trial and error when it comes to natural dyeing.
Instead of tossing your onion skins in the compost, use them to bring new life to some unworn clothes you have lying around. If dyeing items yourself sounds complicated, have no fear, I’ll teach you how! By the end of this process, you’ll have a new method of reducing waste in your kitchen and, if nothing else, something fun and creative to try on a rainy day.
Before we get started, a few disclaimers:
- Different colored onions produce different shades. This may be self explanatory, but I feel it’s worth mentioning. Yellow onion skins produce a yellow dye that varies in strength, vibrancy and tone (we’ll get into these variations in a bit). However, I’ve found red onion skins produce a beautiful chartreuse color that changes with the type of fabric you use.
- When done right, natural dyes can last for years to come. I’ve noticed a common misconception that plant dyes fade easily, or they produce a strong color that fades with each wash. This is a myth! When done correctly, your plant-dyed items can last for many years.
- Natural dyes only work with natural fibers. For the most part, animal fibers (wool/silk/alpaca/etc) will take to dyes more strongly than plant fibers (cotton/linen). If you’re working with a synthetic blend, or you’re unsure what type of fabric you’re dyeing, try a burn test (more on the burn test coming soon, join my email newsletter to find out when new blog posts and tutorials are published).
- Natural dyeing is a test of trial and error. Many factors are at play when it comes to home dyeing. Your first try may not come out exactly how you imagined, and that’s okay. Embrace the process; every failure is a success with the right mindset.
That said, let’s jump in!

What you’ll need:
- Onion skins – 5 large handfuls, give or take
- Water – Tap water is fine
- 1 large stock pot
- 1 large strainer
- Alum potassium for animal fibers, and alum acetate for plant fibers, or your preferred mordant – If you’re new to mordanting, stay tuned for an intro to mordanting guide coming soon! Join my email newsletter to know when it's published.
- Fabric or clothing you’d like to dye
- 1 Bucket for rinsing
Collecting:
I typically like to save my onion skins in a gallon sized bag and collect them from the onion basket at a large grocery store where no one cares. I am always prepared to explain what I am doing but no one has ever asked. You can offer to pay for them at checkout but since grocery stores normally throw them away, I have never actually been charged. You can fill up a produce bag at the grocery store to get enough for dyeing.
I use approximately 5 big handfuls of onion skins in one dye bath, but the amount you add will depend on the weight of your fiber. The heavier your piece is (weighed dry), the more onion skins you will need. Be sure to peel the skins carefully to avoid molding. If you’re saving skins over time, store in an air-tight container.


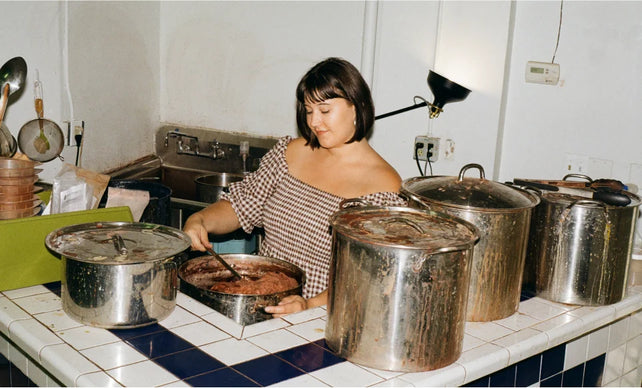
Steeping:
Add your onion skins to a large pot and fill 2/3 of the way with water until they’re entirely covered. Next, bring your bath to a simmer on medium heat. Let the onion skins steep for approximately 1 hour, stirring the bath on occasion. Then, strain the onion skins through a large colander or fine mesh strainer and set back on the stove at a low heat.
I’ve had the most success mordanting, or applying the mordant to my fabric before dyeing. I suggest mordanting your fabric the day before before creating the dye bath for the best results. More on the mordanting process coming soon!


Dyeing:
Add the mordanted fabric to the dye mixture and let it steep on low heat for 2-3 hours. Be sure to stir the mixture every so often for even color distribution.
As you continue to experiment with home dyeing, try different mordants and mordanting processes. Plant dyes are pH sensitive, meaning you can achieve different results, shades and tones by simply adjusting the acidity of your dye. For future use, store your leftover dye in an air-tight container and store in a cool, dry place.


Aftercare:
Rinse your fabric in a bucket of water and hang to dry. When washing your fabrics after dyeing, be sure to use a pH-neutral soap, I recommend Dr. Bronner’s Castile soap.
If you dye different types of fabric or yarn in the same dye bath and they come out slightly different shades, this is due to the different fabrics taking the dye differently and is very common.
You did it! The last step is to enjoy and admire the fruits of your labor. You, my friend, are a home dyer now. Have fun, try new things, and read some of my other blog posts for more information on making plant dyes at home.
Cheers!
-Meg
Hamtramck, MI 48212
Keep in touch
Sign up with your email address to receive news and updates. Receive 10% off your first order when you sign up!