
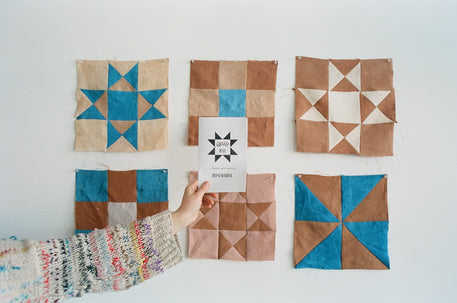


How to Sew an Ohio Star Quilt Square
It’s hard to explain the simple joy that comes from selecting colors, cutting and piecing together fabric. Quilting is a craft that is simple, accessible and creative. There’s no “wrong” way to do it. You can follow traditional patterns made up of triangles and squares, or you can intuitively piece together a design of your own.
I love quilting because you can use every precious bit of fabric and leave almost nothing to waste. In my practice, minimizing waste is so important as a way to reduce environmental impact. It’s also a fun creative challenge to ask yourself - what can I make with these oddly sized pieces of fabric?
The Ohio Star is a beginner-friendly quilt square, and an extremely satisfying way to use up small bits of fabric. Whether you’re using Rosemarine Textiles studio scraps from our Quilt Kit (available here) or your own fabric pieces, follow this tutorial to create your own 12x12 Ohio Star quilt block!


STEP ONE:
Cut out the following squares:
Color A
(1) 4.5” x 4.5” for the center
(2) 5.25” x 5.25” for the triangle pieces on the sides of the pattern
Color B
(4) 4.5” x 4.5” squares for the corners
(2) 5.25” x 5.25” for the triangle pieces on the sides of the pattern


Press the seam open and trim any excess overhang at the corners.
Repeat this process with your second set of 5.25”x5.25” squares.
You should now have four squares composed of two different colored triangles.

STEP THREE:
Time to repeat some steps!
Layer two of your new squares, right sides together, alternating Color A and Color B.
Pin together. Draw a diagonal line through the center like you did before.


Just like you did previously, sew parallel to the line on both sides. Then cut along the drawn line.


Trim off any excess fabric so that they are all the same size after sewing together. Press all the seams flat.
Repeat with your second set of half square triangles.
You should now have four squares consisting of four small triangles, each triangle containing two triangles of Color A and two of Color B.

STEP FOUR:
Lay out all of your quilt pieces (there should be nine total) to show the arrangement of the design.

With right sides together, sew each row (three squares) together using a 2/8” seam allowance. Press flat and then trim any excess to make each square the same dimensions. Each row should have three squares.


After you sew together the first and second rows, press the piece flat. Again, you can trim any excess off the sides to make sure it all lines up.
Now sew rows two and three together in the same way, basting if that’s helpful for you. Check to ensure that the seams from the first two rows are lined up with the third row. Once you have everything lined up, press it flat.

Voila! Your Ohio Star Quilt Square is complete.
This 12”x12” square can be used however you’d like. Finish the edges and add some ties to make a super cute wall hanging, or sew your square onto a tote bag or sweatshirt as an appliqué. Play around with it and have fun!
Hamtramck, MI 48212
Keep in touch
Sign up with your email address to receive news and updates. Receive 10% off your first order when you sign up!